This is my first project as a DT member for Ivytreee Studio
My passion has always been to be involved with Missionary Outreach work, but it is only recently in my life that I have been able to fulfill some of that longing. I joined the Holokleria Church in 2015, and have been blessed to be able to visit our partner church in Bochum (Limpopo Province) twice already, to refurbish their creche and church buildings. Then our Pastor asked if there was something special that I would like to do! Wow. I thought about it and prayed about it, and felt I wanted to work with the ladies of the church, and teach them mixed media craft, and at the same time create a work of art they could hang inside their church.
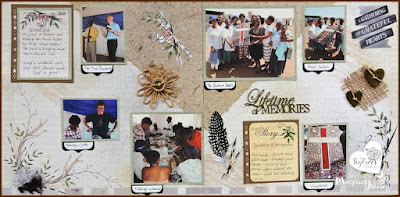
This then, is my scrapbook page using Ivytree Studio papers (click on layout image for larger preview), with close ups of some of the items on the page. Scroll down for material used, as well as the story behind the photos.
Notelet cut from "Ivytree Elements" paper 163/15 "Pretty Pocket Cards - Wordy Delights" from the Wild & Free Collection
Handmade quills using toothpicks and black and white marker pens.
Materials used
Background papers: 163/3 "Porcupine Script/Quill script" from the Wild & Free Collection. I absolutely love these papers because the left and right papers have images that match, but are not the same!! One sheet of paper has both images on the same sheet, cleverly placed so that if you use 2 sheets, you can get them to match up like I did.
Notelets cut from 163/15 "Pretty Pocket Cards - Wordy Delights" from the Wild & Free Collection
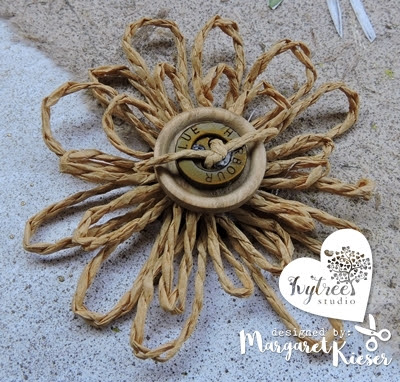
Jute string and buttons for the flower
Small piece of hessian
2 chipboard hearts, and one Enmarc "Lifetime of Memories"
Ink spray (olive green and bronze) for hearts
Glossy Accents
Toothpicks
Black and white marker pens
Glitter glue
Punches
Visit Ivytree Studio to see more of what they are up to.
Buy some of their pretty paper here
Connect with the team on their Facebook page here.
Share your Ivytree Studio layouts with us here
The STORY behind the scrapbook page photos
The day arrived (October 2016) and I was so excited that the 4 hour drive from Pretoria felt like 10 hours - I wanted to get started! But first priority was of course to hold the service. Now, if you have ever attended a church service in Africa, you will realise that time does not factor into any calculations! Andre gave the sermon, with Ps Calitz translating.
After the service, the ladies set up two long tables for us to work on. I started by showing them a smaller sample I had created, and explaining how each piece was made. I then stood back and let them decide which of the many items on the table they wanted to use. There was only one rule - the cross had to be filled with the red and white seedbeads, and outlined with the mirror strips (reason below).
The ladies decided who would be creating the crumpled bits of newspaper, who would be gluing, and who would be pasting pieces down. I have learnt from my work experiences that "buy-in" is essential for the success of any project! And sooooo ... with a little hesitation as to what they were actually doing ... they followed my basic instructions and got on with the task.
We had a fabulous time, with the ladies singing while working, and here and there a good laugh was had.
When we came to the part where they had to cover EVERYTHING they had painstakingly glued onto the board - with BLACK paint - they reacted exactly as I expected they would - nooooooooooo! A little persuasion from me, and a comparison to how our lives are full of sin and black, until God forgives us through the Blood of His Son and creates something new - then they accepted it and went for it!
After gluing on the red seedbeads (representing the Blood of Jesus), the white seedbeads (we are made pure through His Blood), and framing the Cross with the mirror strips (God's love reflecting in us), brushing some gold and bronze Gilders paste over the raised paper edges, and adding a few red glass pebbles, the project was completed.
It was a blessing to see how proud these ladies were of their own artwork.
One of the men popped in to see the end product and immediately had ideas of starting a little business making mixed media artwork. A week later I was asked for a list of all the materials used. What a blessing to know God used little old me, and I cannot wait to visit again.


