Friday, December 25, 2015

Fun at CANSA

Let's Scrap Sketches challenge 12-15-15 is to use this sketch...

This is my second layout using the 12-15-15 sketch from Lets Scrap.

I treated some of my grandchildren and their mothers (my daughters) to a morning at the local CANSA (Cancer Association of South Africa) fund raising event. We all had our hair spray painted, and the three younger kids had their faces painted. While the adults browsed the flea market for some goodies to buy, the kids had fun on the jumping castle, and participating in the dance competition. A fun morning for all, while supporting a good cause.

I used 4 pattered papers in this layout instead of plain cardstock, and added some pink speech bubbles and titles to represent the pink in the CANSA ribbons. The chevron stripes were made with Washi Tape.

I am entering this layout into the current Let's Scrap Sketches challenge 12-15-15.

Monday, December 21, 2015

The 2015 Jakaranda Home Christmas Light Festival

Let's Scrap Sketches challenge 12-15-15 is to use this sketch...

My youngest daughter, her husband, and their two kids and I visited the Jakaranda Liggiefees (Christmas Light Festival) last week, and wow these people have really pulled out all the stops this year. The children's home uses this as a fundraising event. They decorate 21 houses with millions of lights, and then open the venue to the public to walk around and enjoy themselves. The programme runs for the whole month of December, and includes popular local artists, orchestras, singers, and a laser show to entertain all the visitors.The kids always love it, especially when this granny buys those light-up wands - or swords as they call them!

I turned my layout a little differently to the sketch above so that I could fit the portrait photos in, and of course there is lots and LOTS of bling to represent the lights.

I am entering this layout into the current Let's Scrap Sketches challenge 12-15-15.

How to make paper flower roses with the rose punch

Do you have one of these punches (large, small, or both), but are stumped what to do with it apart from creating flat flowers for your scrapbook pages or cards? As long as the punch has SIX (6) petals, you can made these stunning 3D roses.

I made this arrangement in 2006 (yes 9 years old this year), and all 5 my grandchildren have at some stage or another pulled the arrangement apart and played with the flowers, and it still looks good! I made each individual rose with this punch and glittered up some of the edges of the petals.

What you need
Rose punch
paper glue
paperclips
good quality scrapbooking paper (plain or patterned or both)
scissors
matching chalk/distress ink to distress the edges
flower stamens
florist wire
two paper leaves


Method
1. Punch THREE flowers out of your papers
2. Fold each flower in half 3 times so that you end up with all folds crossing at the centre of the flower
3. From the first flower, cut out ONE petal; cut TWO petals from the second flower; cut the third flower in half; cut the left over 3-petal half into one petal and 2 petals. Curl the petals.


4. Distress all the edges of the petals with your chalk/distress ink.


5. Starting with the largest piece, glue one of the cut edges with a thin line of glue, then fold the other edge just over, and fasten with a paperclip. Repeat for all pieces except the single petal, which you need to roll up.


6. Using an awl or a thick sewing needle, punch a hole in the centre of each of the glued petals. Bend over the one end of the florist wire to form a loop, and push the other end through all the flower pieces, starting with the single petal and ending with the 5 petal piece, and make sure the loop in the wire is at the base of the inside of the flower. Fold the stamens in half and glue inside the rolled petal. Wrap two leaves behind the rose, and end up with wrapping the whole stem with florist tape. If you want to add some glitter glue, lightly glue some of the edges of the petals.


The end result!


Have fun!

Saturday, December 19, 2015

Elf Christmas wreath

Sometimes I put foot to the pedal and create something that I know will always be a one-off! This huge Elf Christmas Wreath is one of those one-offs - now hanging in my eldest daughter's home.

I decided to respond to the monthly competition in the R&R Arts and Crafts Facebook page, where we were tasked to make a Christmas embellishment using not less than 1m of ribbon.

Competition result .... I shared the FIRST prize with another contestant! 

How I made up the wreath 

Materials
Calico material for the face, ears, nose, and hands
Quilting material for the arms and legs
battery operated lights
Dark green feather boa
Small red and gold baubles
Teddybear stuffing
Two old wire clothes hangers
10m of wire (thin and thick)
I used 14m of various wide and narrow ribbons (red, gold mesh, white, green)
4m of gold cord


Method
Open up the hangers and shape into circles
Wrap some thick wire criss-cross across these hangers so that you will have wire to fasten all the ribbon to.
Cut out head, ears, and hands from calico. I did not use any pattern, just more or less guessed the shapes and sizes.
Cut arms, legs, and shoes from quilting materials.
Sew hands to arms, and shoes to legs, then stitch up side seams, stuff and close openings.
Attach the arms and legs onto the frame with thin wire, making sure they are firmly fastened.


Wind the light string around and through the wire frame and crossed wires, making sure that the switch on the battery is behind one of the arms so you can reach it easily.

Wind the feather boa around and through the wire hanger frame, making sure you cover most of the area.


Make up ALL the ribbon bows and cords and bind with thin wire, then fasten randomly onto the hanger frame.
 

Head: stitch ears and stuff, and sew onto head. Make a small nose and stuff. Stitch a mouth using embroidery thread. I made the eyes using two small pompoms which I glued in place. I also glued some stuffing onto the hat brim.
Fasten head securely to the wire frame and fluff the feather boa around it.
 

So, a little madness, many hours of labour, but I love the end result - and so does my daughter!

Monday, November 30, 2015

Brownwen's wedding


Let's Scrap Sketches challenge 11-15-15 is to use this sketch...
Been wanting to scrap a page of my nieces' wedding this year, and this was a perfect opportunity with this gorgeous sketch. I battled a little cutting all those diagonal pieces of paper, but it worked out ok. I did not add many embellishments except for some glitter glue, pearl sequins, and some beautiful lilly flowers.

I am entering this layout into the current Let's Scrap Sketches challenge 11-15-15.

Sunday, October 25, 2015

Kriewel Revue 2013

Update .. this layout won Top3 pick

Let's Scrap Sketches challenge 10-15-15 is to use this sketch...
Thank you Michelle van Wyk for this gorgeous sketch. I adjusted it slightly to fit the photo shapes and sizes I already had of my grandkids' school revue. I love the bright colours that were used to design their costumes, and have incorporated these into the layout viz. pink, blue, and silver. I used a holographic silver paper, hence the rainbow of colours seen in the photograph. In real life my eye only picks up the silver.

If you look carefully at their costumes and makeup, you will see "hearts" sewn onto the costumes, and "swirls" painted on their faces, and I tried to capture that with some of the embellishments. The pink ribbon is meant to pick up the pink frills on the girls' costume. LOTS and LOTS of BLING on my layout!


I am entering this layout into the current Let's Scrap Sketches challenge 10-15-15.

Sunday, July 26, 2015

Rose heart bouquet colouring page

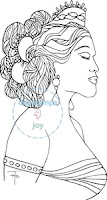
This is my second adult colouring page that I have drawn for Digistamps4Joy called "Rose heart Bouquet". I actually had a lot of fun colouring this in! The image is sized for an A4 page.
I coloured it in with a combination of Copic pens and Spectrum Noire pens, then added highlights with a white pencil.

New items used - digital colouring page image


Rose lady

Our new artist at Digistamps4Joy is Tanya O'Connor and she drew this gorgeous digi called "Strong Lady 3". What a gorgeous image - I love all those roses around this lady! If you purchase this digistamp, both Tanya and I will donate part of the proceeds to the Cancer Association of South Africa, so indirectly you are also donating to CANSA. 
I coloured her in with a combination of Copic pens and Spectrum Noire pens, added the requisite bling (of course!), mounted it on 2 papers that I found in my stash, and added some ribbon and a gem.

New items used - digistamp
Old items used - BP, green cardstock, patterned papers, white pastel pencil for highlights.


African Queen

Our new artist at Digistamps4Joy is Tanya O'Connor and she drew this gorgeous digi called "Strong Lady 1". When I first saw it I saw an African lady so have attempted to colour a darker skin - not easy! If you purchase this digistamp, both Tanya and I will donate part of the proceeds to the Cancer Association of South Africa, so indirectly you are also donating to CANSA. Cancer affects anyone, no matter your skin colour, and I thought by colouring this digi in with an African skin, it would pay tribute to all our African sisters who also have been battling this disease.
I coloured her in with a combination of Copic pens and Spectrum Noire pens, added the requisite bling (of course!), and mounted it on 2 papers that I found in my stash that I thought have a slight African feel to them.

New items used - digistamp
Old items used - BP, brown cardstock, white pastel pencil for highlights.


Wednesday, July 15, 2015

A Gift For You

Make It Crafty has a challenge running for  a CAS Skaker card. My first thought was .... a shaker card simple/plain? Making a shaker card requires quite a bit of work. BUT, after looking at the fabulous samples of the DT I realised OK, not too difficult. My problem of course is that I really battle to make CAS cards! It always feels to me as if something is missing.

This is MY version of the CAS Shaker card - I love making shaker cards btw. Perhaps not as CAS as it could be, but the best I could do without adding too much. I used the MIC image "Little girl decorating" image and coloured her in with Copics and SN pens. The tree was cut from green cardstock and 3 separate shaker areas were made. Bit tricky getting the tiny shaker bits into the small area, and I probably have quite a few on the floor now, but eventually I managed. Only one BP used - I tried using the white background but the card looked really empty to me. A little glitter glue and sequins added as baubles, a peel-off sentiment, vase and ribbon, and the card is finished.


New items used - vase
Old items used - BP, green cardstock, white gel pen, chalk, alcohol pens, glitter glue, sequins, peel offs.

I am entering this card into the following challenges:
Make It Crafty - CAS shaker challenge


Happy Birthday Abby

Let's Scrap Sketches challenge 7-1-15 is to use this sketch...
My daughter and I are still catching up on her 2012 album, but at last making progress! Thanks are due to Let's Scrap for all their inspirational sketches!

Sketch 7-1-15 fits in nicely with a layout of photos of my grand daughter's 9th birthday party.  I picked up the bright pink top she was wearing and carried the pink over into the layout, so it is very bright! The lemon green hopefully breaks the pink a little. All the daisy flowers are from a punch that creates a border, and these are the bits that fall out. The lemon green squares are from a die. Here theme was "Hello Kitty" but was basically only picked up in the cake decoration by her mom. Instead of making a Hello Kitty layout, I decided to go with the flower theme to match those on the cake.

I entering this layout into the current Let's Scrap Sketches challenge 7-1-15.

Sunday, July 12, 2015

Let God be your guiding light

I drew this digi for Digistamps4Joy and called it "Coral Corner".  
I love my aquariums (I have 3!). I would love to be able to own a marine tank as the fish are just so beautiful and the anemone and corals absolutely amazing, but it is so expensive and a lot more difficult to maintain. Instead I always admire the marine tanks in my local pet shop. But, I "can" draw a coral scene and create my own marine card!

This is a centre-stepper card shape. I used left over Graphics 45 (By the Sea) papers as the backing, and die cut some leaves and swirls as well. The digistamp is coloured with my Inktense pencils and OMS, and highlights added with white gel pen. I used strips of paper and different blue TH chalks to create the sunrays coming through the water.

New items used - digistamp
Old items used - BP, white cardstock, white gel pen, chalks.

I am entering this card into the following challenges:
Kraftin Kimmie - Anything Goes
Outlawz challenges - Anything Goes + twist use die cuts
Art by Miran challenge36 - anything goes
TTCRD - anything goes


Sunday, June 07, 2015

Kriewel Revue 2012

UPDATE: My layout was chosen as Top 3 Pick at Let's Scrap for this challenge!

Let's Scrap Sketches challenge 6-1-15 is to use this sketch...
Thank you Michelle van Wyk for this fabulous sketch! It fits in perfectly for the layout I have been wanting to do of the 2012 concert photos of my grandchildren's school. Their school won 1st place in the 2012 inter-school competition, so the school arranged for professional photos to be taken of the individual children participating. Their costumes were absolutely fabulous.

I switched the 3 photo placings on the right-hand side page to some decorative swirls instead, and in place of the large stars as embellishments, I added swirls to match the make-up swirls on the kids' faces. And of course LOTS and LOTS of BLING on my layout! The grey swirls were cut out of grey-glitter cardstick, and the string is actually a string of very shiny sequins. Such a pity that the photographs do not do justice to the real-deal.


I am entering this layout into the current Let's Scrap Sketches challenge 1-1-15.

Friday, May 29, 2015

Lowell's 2nd Birthday layout

UPDATE: This layout made Top 3 Pick at Let's Scrap for their challenge!


Let's Scrap Sketches challenge 5-15-15 is to use this sketch...


What a gorgeous sketch, and as I have been meaning to scrapbook Lowell's 2nd birthday in January, this sketch is perfect. My daughter Natasha backed the cake for Lowell as he loves cats.


I paper-pieced the Jack-in-the-box from a template in Marina du Plessis's first book (Creative Scrapbook Piecing), as the large embellishment on the left page, and used the balloon template for the right hand page.

Here is a close up of the Jack-in-the-Box


A special guest was Great Grandma Kleintjie Janse van Rensburg, seen here with Ethan and Lowell.


I am entering this layout into the current Let's Scrap Sketches challenge 5-15-15.

 ðŸ˜žðŸ˜žðŸ˜ž WHAT HAPPENED? Unbelievable! I cannot fathom out WHY I stopped writing on my blog after May 2017!!! I also cannot remember what happ...